Lord of the Rings Online is a great game, but the UI is dated. To fix this, many players use skins from the popular JRR Skins Collection, available on LoTRO Interface here. This is a great set of interfaces, but it’s got problems, and I’ve got patches.
First, of note, many of these patches are provided by the author of the skins themselves. However, they aren’t provided as patches; they’re provided as replacement SkinDefinition.xml files. What this means is that you can have one patch, or the other, but not both. With Update 38, LoTRO moved character portraits to a background layer, meaning JRR Skins Collection required a patch. So with that mandatory patch, you can’t have any other patches unless you manually edit them, which is what we’re going to do here.
Requirements
I’m going to assume you have a working copy of Lord of the Rings Online installed. You’re also going to need a text editor with bulk find/replace options. I’d recommend VS Code if you’re on Windows or MacOS. If you’re on Linux I’m sure you can figure out how to do text find/replace. I’m writing this guide from a Linux machine, but everything will be targeted towards a Windows audience; everything I say should be universal anyway.
Installation
I’d recommend doing a fresh install of the skins to follow this guide. It’s easiest to start from scratch.
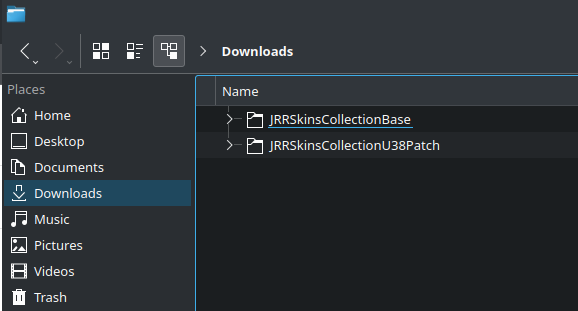
First, download the two ZIP files for the base skin collection and the U38 patch. I won’t directly provide the download links, but here are the two LoTROInterface pages:
https://www.lotrointerface.com/downloads/info581-JRRSkinscollection-Atributetomiddleearth.html
https://www.lotrointerface.com/downloads/info1228.html
Once you’ve got them downloaded, I’d recommend extracting them to separate folders. Depending on how you extract them, they’re both going to want to extract to a folder called “JRR Skins Collection”, in whatever directory you extract them from. For our purposes, it’s easier to extract them separately. I’ve done this below.
The steps below can also be accomplished by first downloading the base folder, then downloading the patch, then extracting the base folder, then extracting the patch. Overwrite files when asked. This should result in the two directories correctly merged.
The base folder contains everything needed to use the skin in-game. The patch contains a complete recreation of every SkinDefinition.xml file as well as the new art assets needed for U38.
What we’re going to do is drag all of the subfolders from the U38 Patch folder into the Base folder. Overwrite files when asked.
Now we’ve got our working directory; a fully patched base-line skin folder for U38. You can use this folder and skip to the final steps if you’d like the unmodified version. From here, everything I say is updating the skins to match my personal preferences.
Fixing the Map
The JRR Skins Collection made the… decision to shrink the World Map Windows down to the size of the art assets used for the map pages: 1024×768.
What this means is that, on my 2560×1440 27″ monitor, the map is tiny to the point of illegibility, and occupies the top-left quadrant of my screen. For 4k users it’ll be even worse.
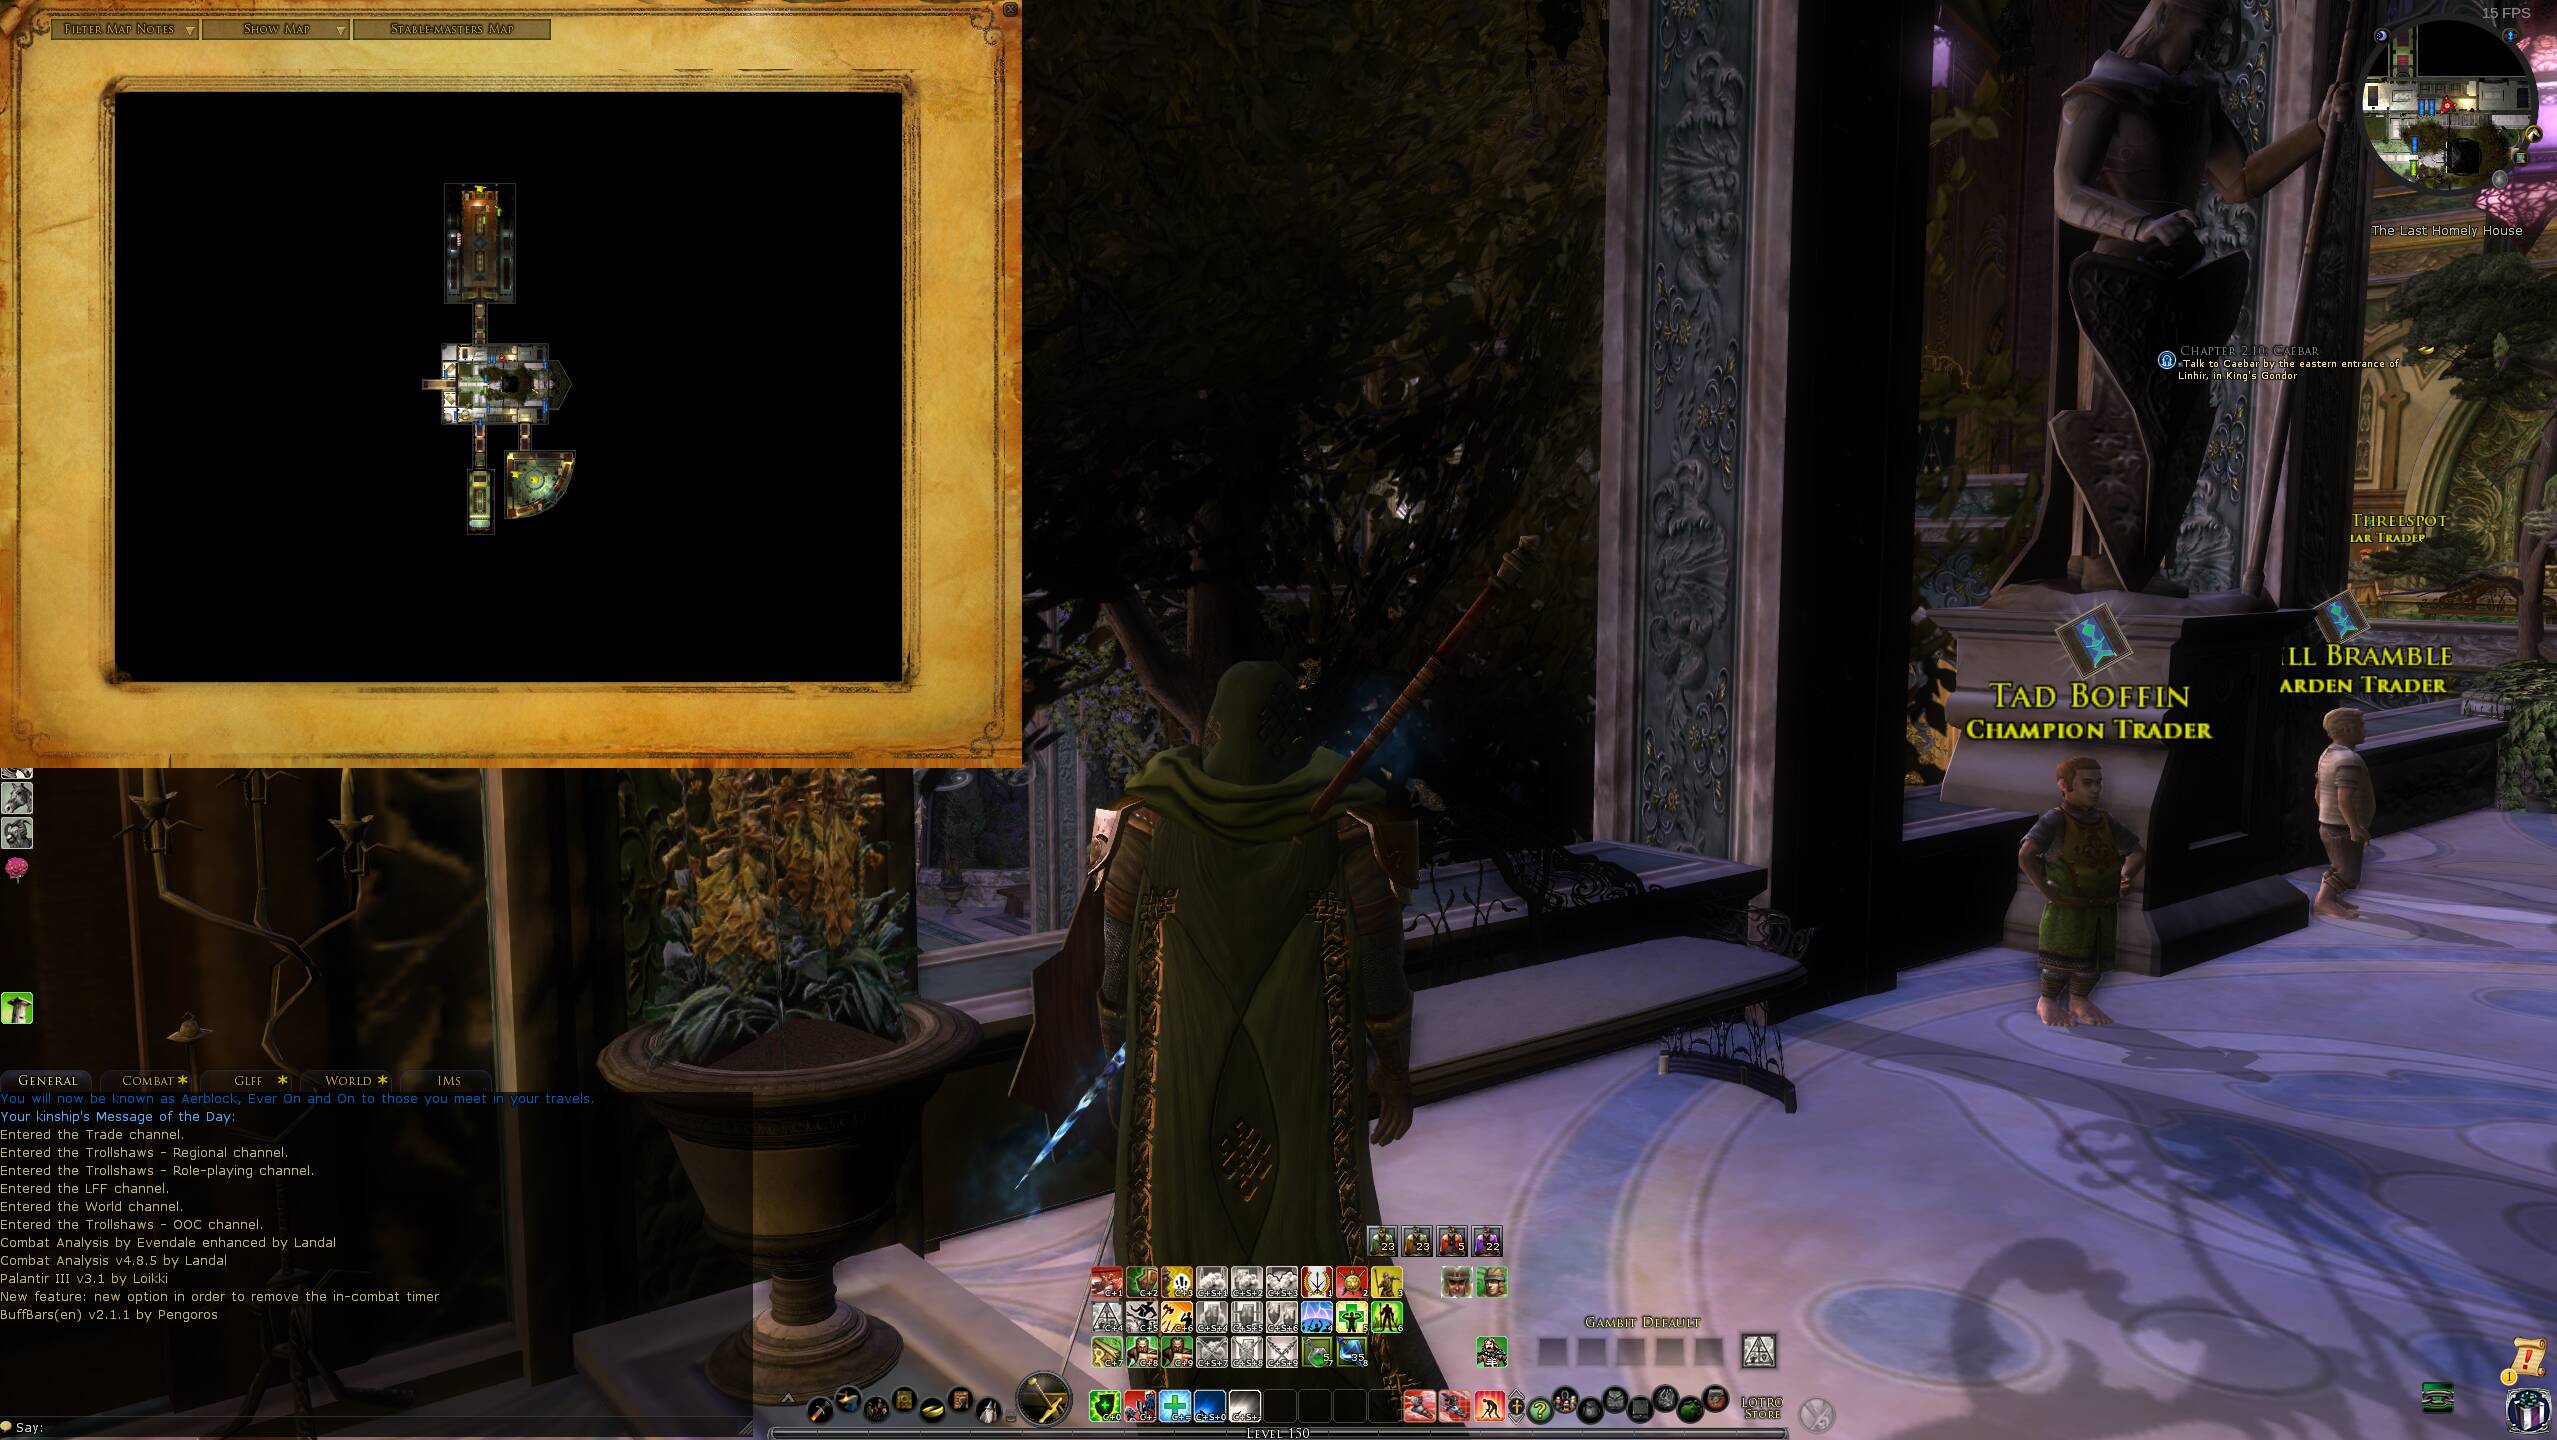
In game, it looks like this. To me this is very silly, but some may like it, and that’s fine.
The default behavior of the game is to stretch the map to fit your screen. In my opinion this blurry-scaling results in a more parchment-like appearance anyway, and is completely appropriate in-context. To the author’s credit, they provide a patch file to restore the default appearance of the map. However, once again, we can’t use more than one patch, and we’re already patching for U38.
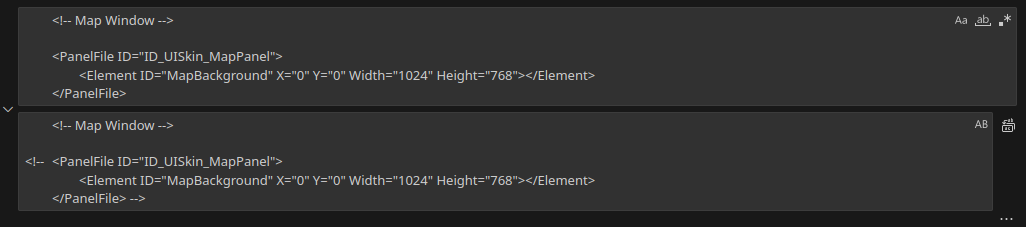
To restore the default map size, open your working skin folder in your bulk find-replace tool of choice. I’m going to use VS Code. Search the entire directory for ID_UISkin_MapPanel. You should see 47 results.
You’ll now want to search for the entire panel element, which looks like this.

You should again see 47 results. You can now use the replace functionality to either delete or comment out this element. To comment it out, just add <!– before and –> after the text. To delete it, simply leave the “replace” field blank.
This should get you back your full-size map.
Fixing the Stable Master
To me this one is really incomprehensible.
Here’s a comparison between the stock and JRR Collection stable masters.
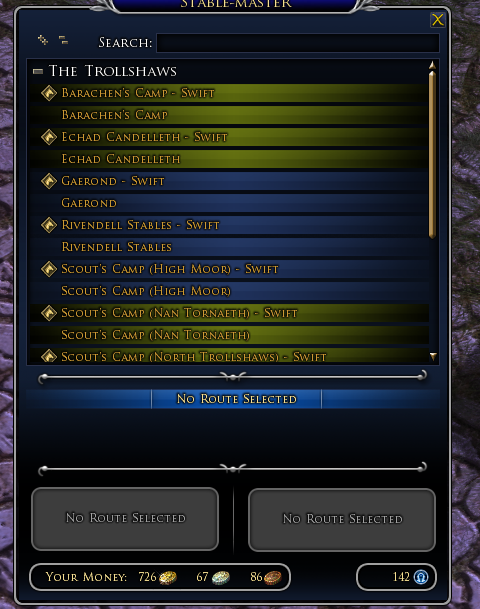
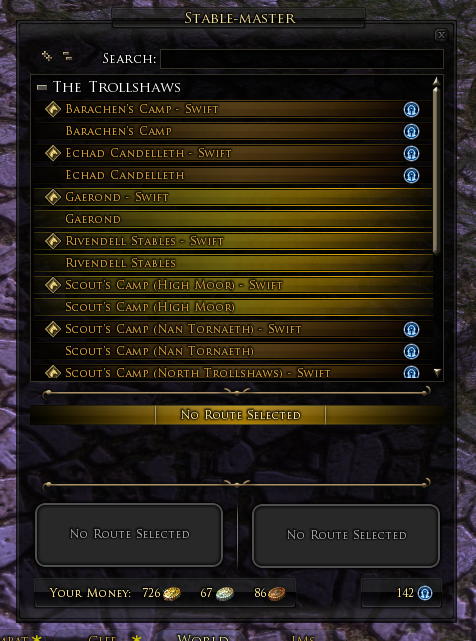
Maybe somebody likes this. Drives me crazy though. It inverts the light/dark cues for what’s discovered and what’s not. Additionally, the stock undiscovered color is very similar to the JRR Collection discovered color.
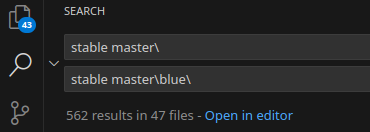
Anyway, here’s how we fix it. If you browse the assets folder, JRR Core, you’ll see a folder called “stable master”. Under that folder, you’ll see all files for the modified stable master, as well as a folder called ‘blue’. This is exactly what you’d think; blue variants of all the JRR Collection stable master elements.
So, all we have to do is find every instance of “stable master\” and replace it with “stable master\blue\”.
Note the slashes. Those are important. That lets us target only lines of code referring to the path, which we want to replace all instances of.
In VS Code, that looks like this. It should yield 562 replacements.
Here’s what we get after our fixes.

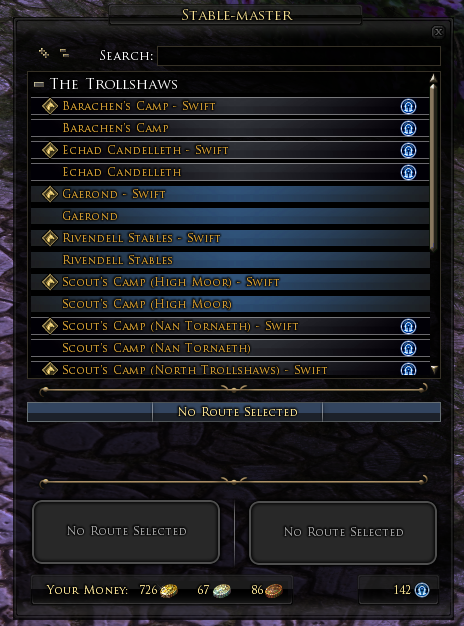
Much better, to me at least. You lose the blue/yellow dichotomy, but discovered locations look the same as they do by default, and undiscovered locations are clearly greyed out.
Actually Installing The Skins
Ok, now we’ve got a modified working directory.
All we have to do now is create a skin folder in Documents/The Lord of the Rings Online. To do that, just navigate to your documents folder and open The Lord of the Rings Online. Then just create a directory called “ui”. Within ui, create “skins”. Copy your modified JRR Collections folder entirely into skins. The result should look like the image below. The full path to your modified JRR Collection should be something like C:\users\{you}\Documents\The Lord of the Rings Online\ui\skins\JRR Skins Collection.
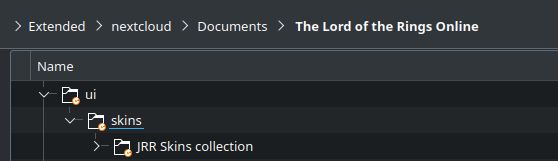
It looks a little different for me because I use my homeserver to back up my user directories, so it’s on a separate disk and in a special location. From Documents down though, it should be identical.
And that’s all I’ve got. If you’ve got any questions, you can message me on reddit at reddit.com/u/aerlock or on Matrix via @ryan:matrix.aerscape.net.